guide
Getting Started
Apr 1, 2025
Toonit
Hello from Toonit!
First, thank you for being a part of the Toonit community.
Toonit was created with one mission in mind — to lower the barriers to storytelling for those who may not have the ability to draw. By providing intuitive 3D tools, we hope to bring countless untold stories to life, empowering creators and enriching the experience for everyone involved.
We’re excited to be part of your creative journey.
1. Getting Started
1.1 Service Introduction and Key Features
1.2 Sign Up and Login
1.3 Recommended Browsers and Environments
1.4 Understanding Basic Screen Composition
1.1 Service Introduction and Key Features
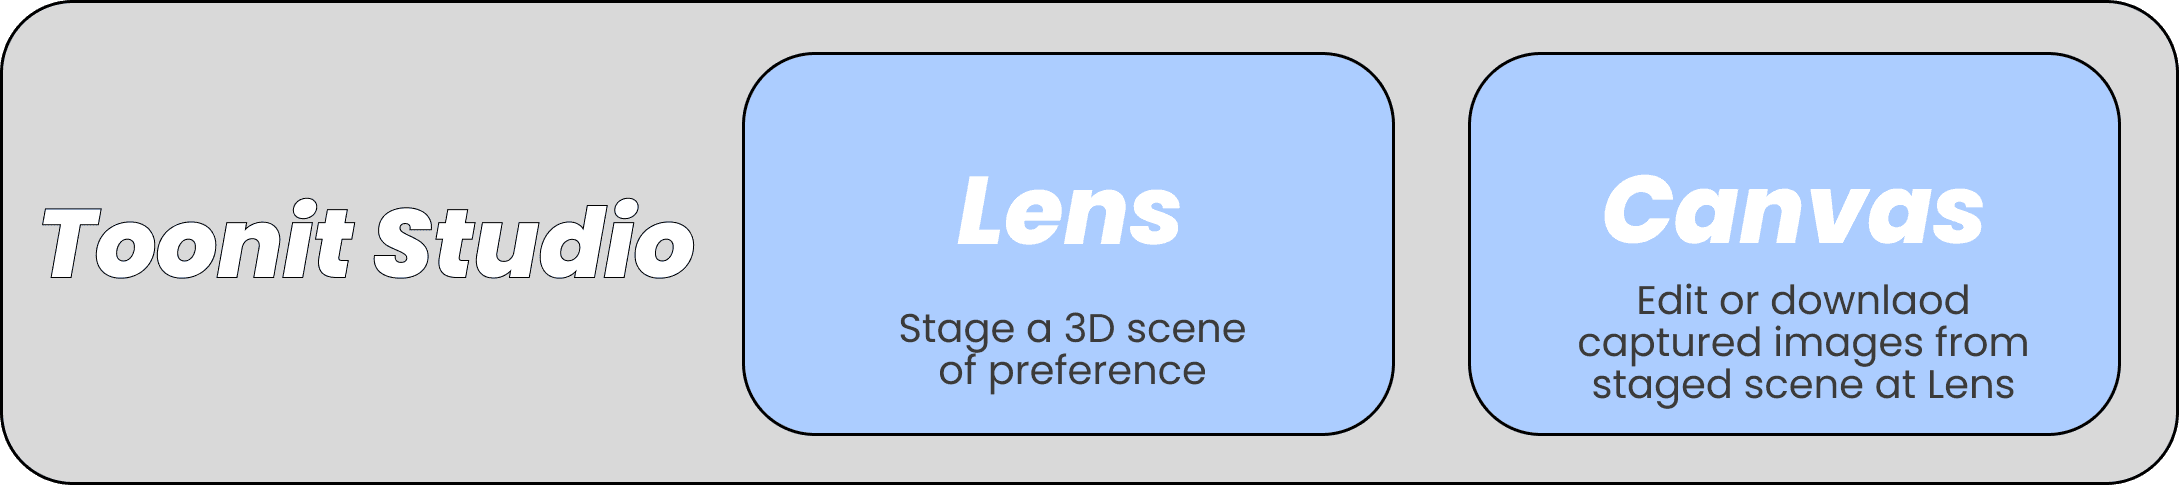
Toonit is a web-based creative tool that helps anyone easily create visual content such as webtoons, storyboards, and scene direction for videos.
The platform consists of three parts: Toonit Studio for content creation, a Content Page where users can view and read completed works, and a Marketplace for buying and selling 3D assets.
We are providing 1,000 Toons for everyone who signs up to freely use Toonit 3D assets.
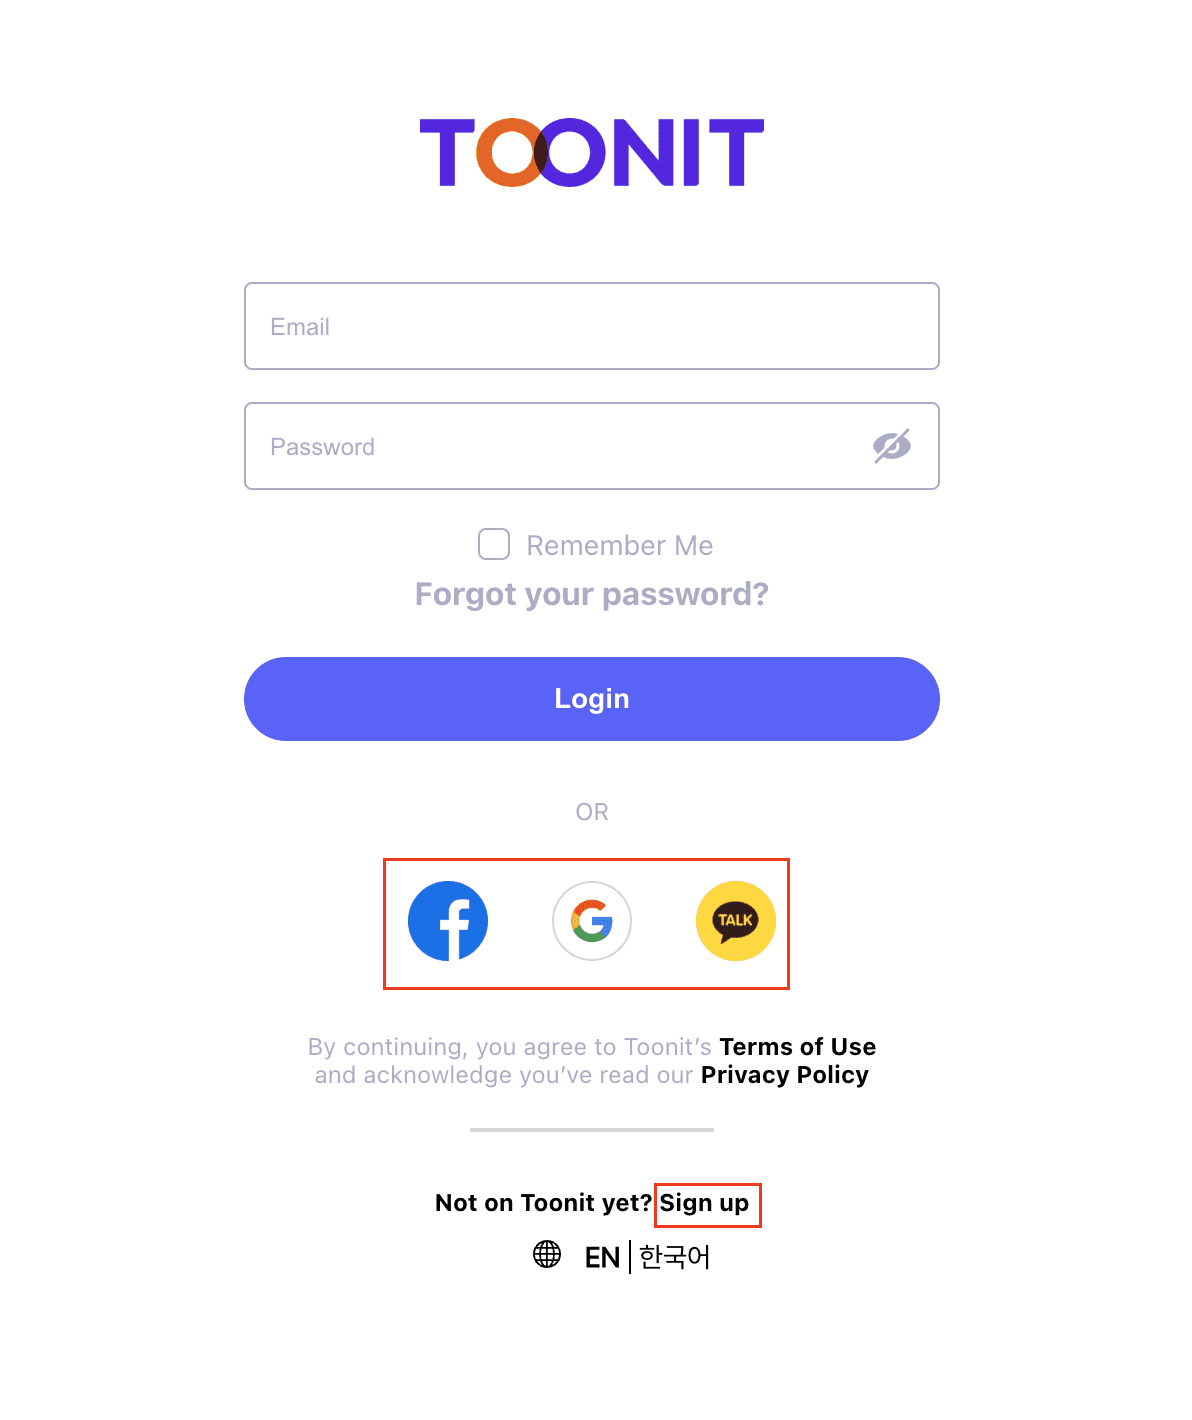
1.2 Sign Up and Login
There are two ways to sign up.
First, click the 'Sign Up' button, enter the required information, and then click the 'Complete Signup' button.
Second, you can easily sign up using a Google or SNS account.
(Note: Sign-up via SNS may be restricted in some countries.)
1.3 Recommended Browsers and Environments
We recommend using Chrome as your browser.
1.4 Understanding Basic Screen Composition
[Toonit Lens]
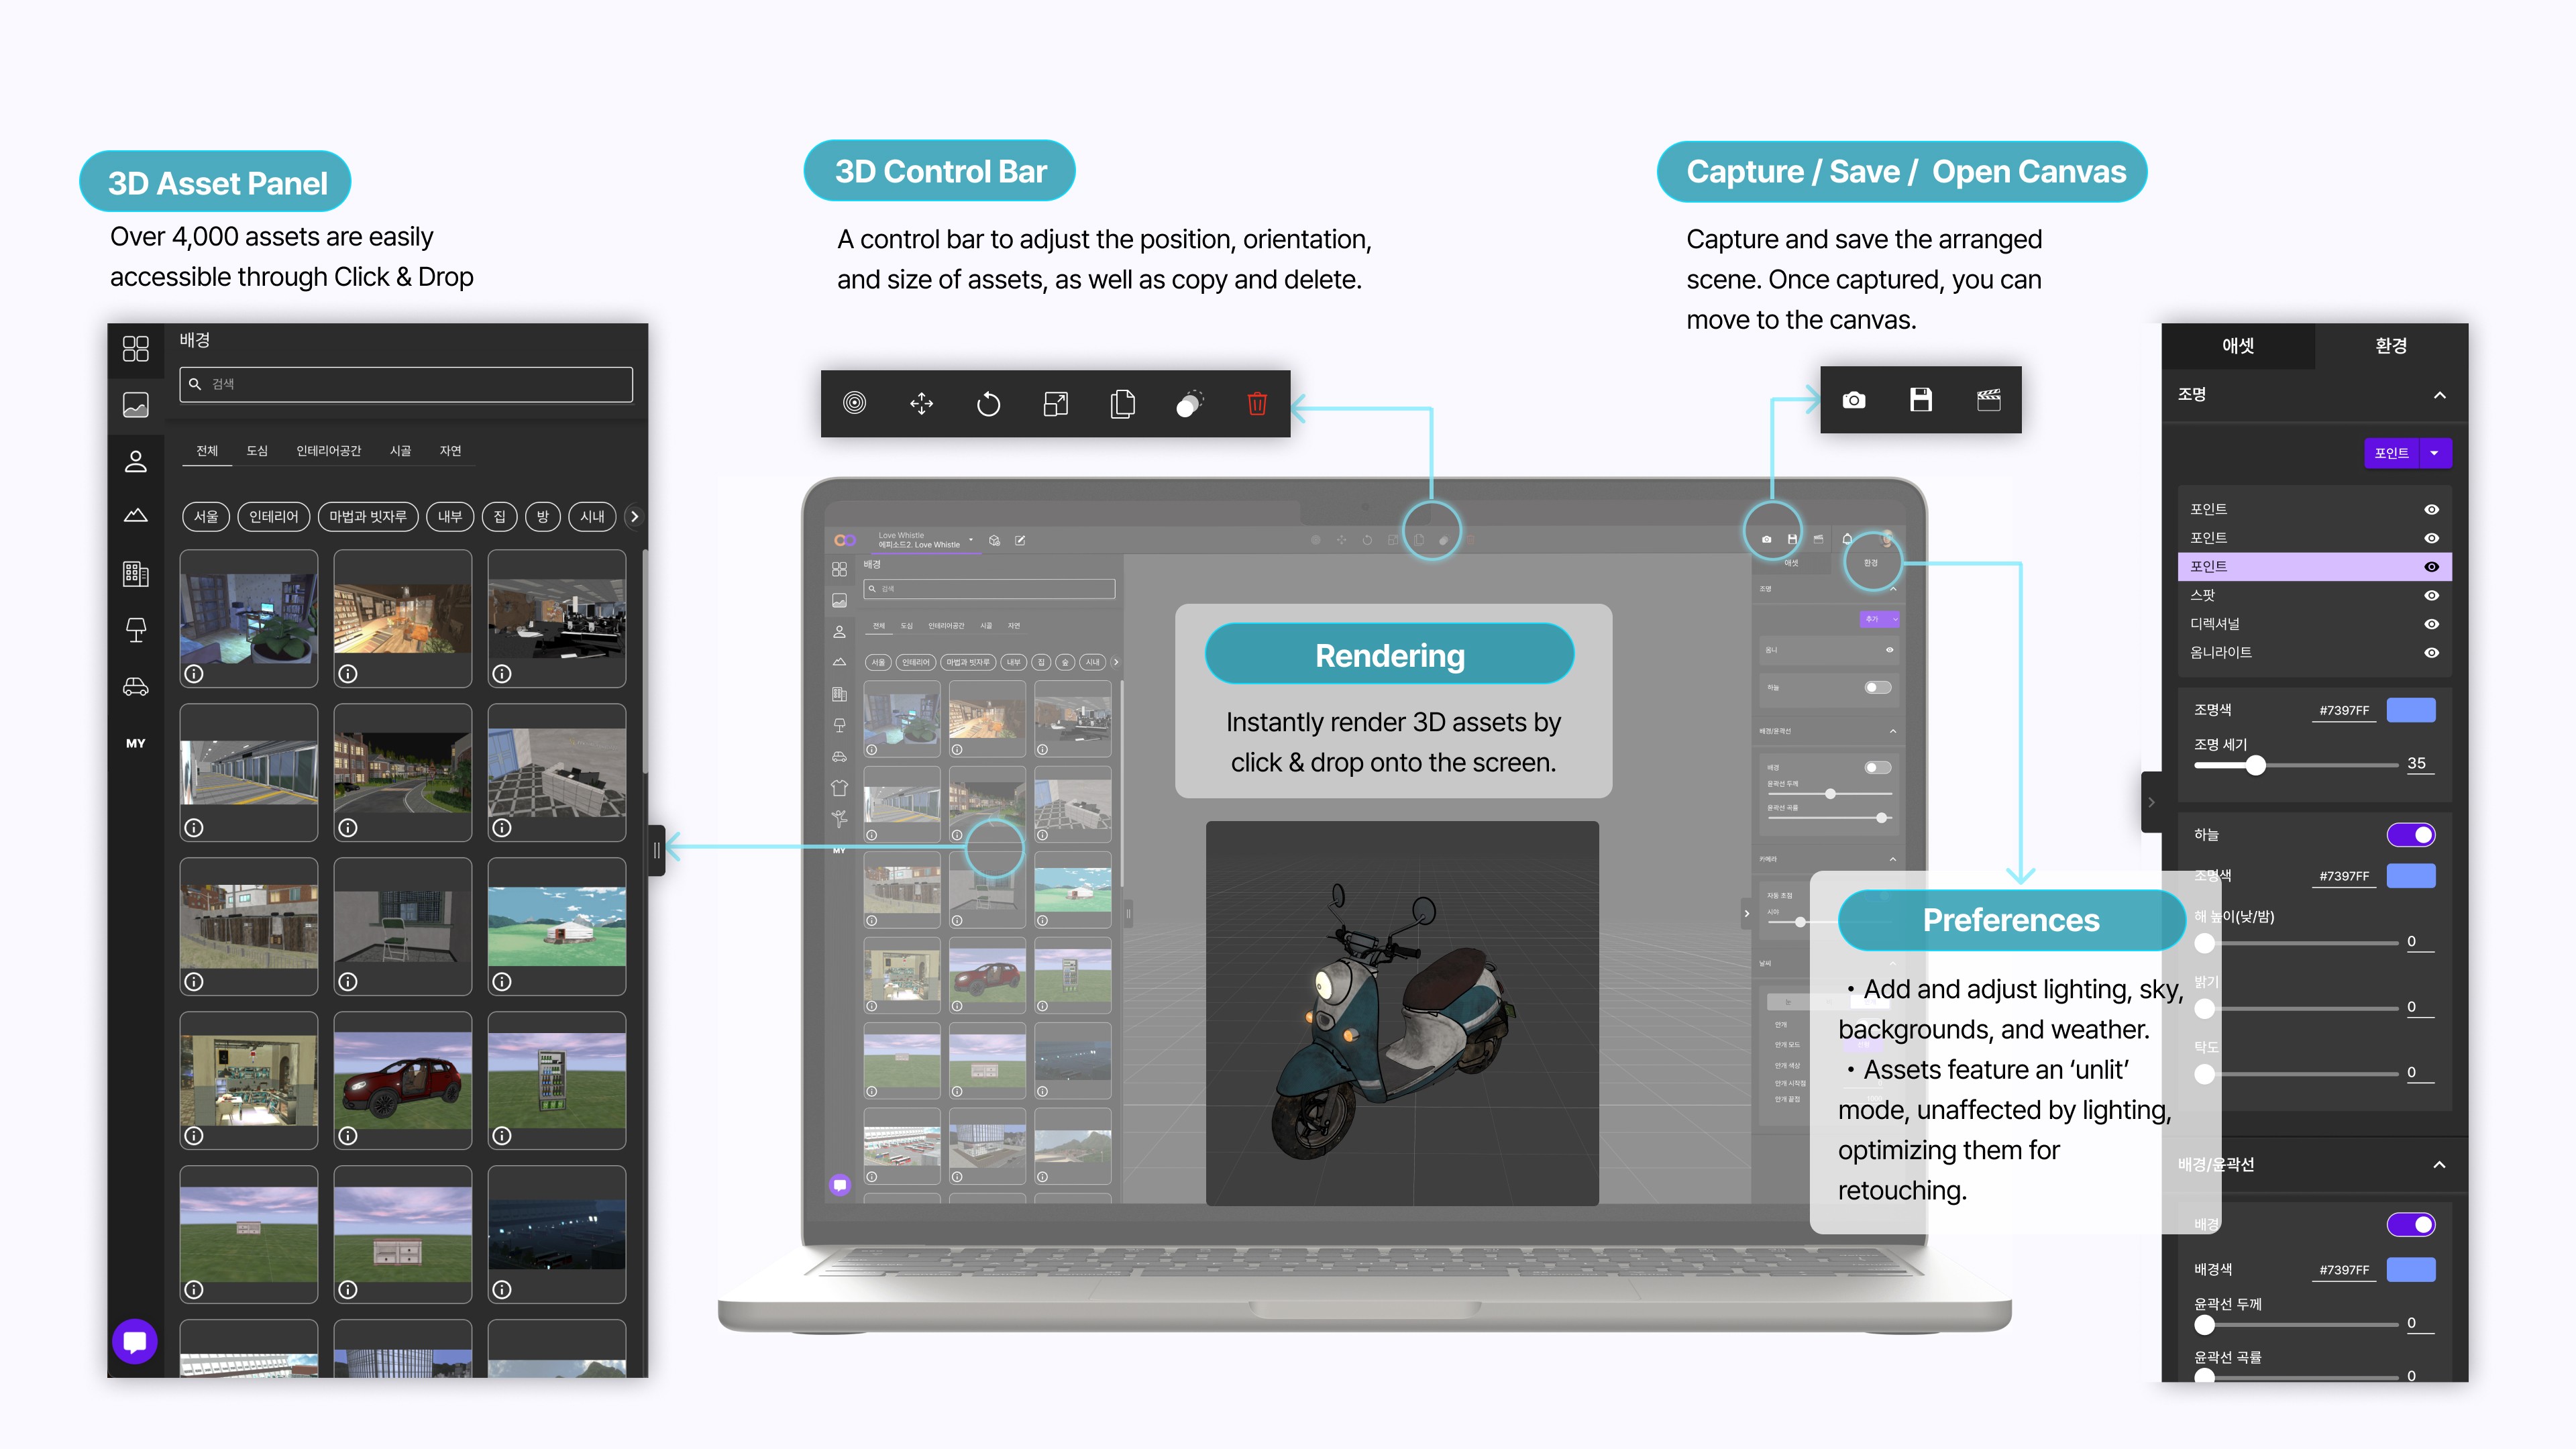
1. 3D Asset Panel (Left Side of the Screen)
This area allows you to view over 4,000 3D assets (backgrounds, characters, objects, etc.) at a glance and easily bring them into your scene.
Users can click or drag the desired asset directly into their workspace.
Additionally, you can quickly find necessary elements through category sorting and search features.
2. 3D Control Bar (Top Toolbar)
The 3D Control Bar is a tool area where basic operation functions like adjusting the position, rotation, and size of the selected object, as well as duplication or deletion, are gathered.
By using this control bar, you can finely adjust characters or props to achieve the desired staging.
3. Rendering Viewport (Central Workspace)
The rendering viewport is the main space where actual work takes place, a 3D space where the selected assets are placed and visually represented.
Users can freely adjust objects in this space and set camera angles and lighting to complete the scene.
All tasks are rendered in real-time, allowing results to be seen instantly as you work.
4. Capture, Save, Canvas Transition Functions (Top Right Menu)
These functions help save the completed scene or capture it as an image, and enable a transition to a 'canvas' for editing work afterwards.
You can save the current scene as a 2D image through the capture function, and save the entire project using the save button.
Pressing the canvas transition button will switch you to the next step, the storytelling creation screen.
5. Environment Settings Panel (Right Side of the Screen)
The environment settings panel allows you to adjust various environmental elements, such as scene lighting, sky color, background tone, and weather effects.
You can finely express the atmosphere you want by selecting colors, brightness, and direction of the lighting, as well as the type of light (point, spotlight, etc.).
Also, by activating the 'Unlit' feature, a bright and clear style that excludes the effects of lighting can be applied, which is optimized for creating webtoon or comic-style content.
[Toonit Canvas]
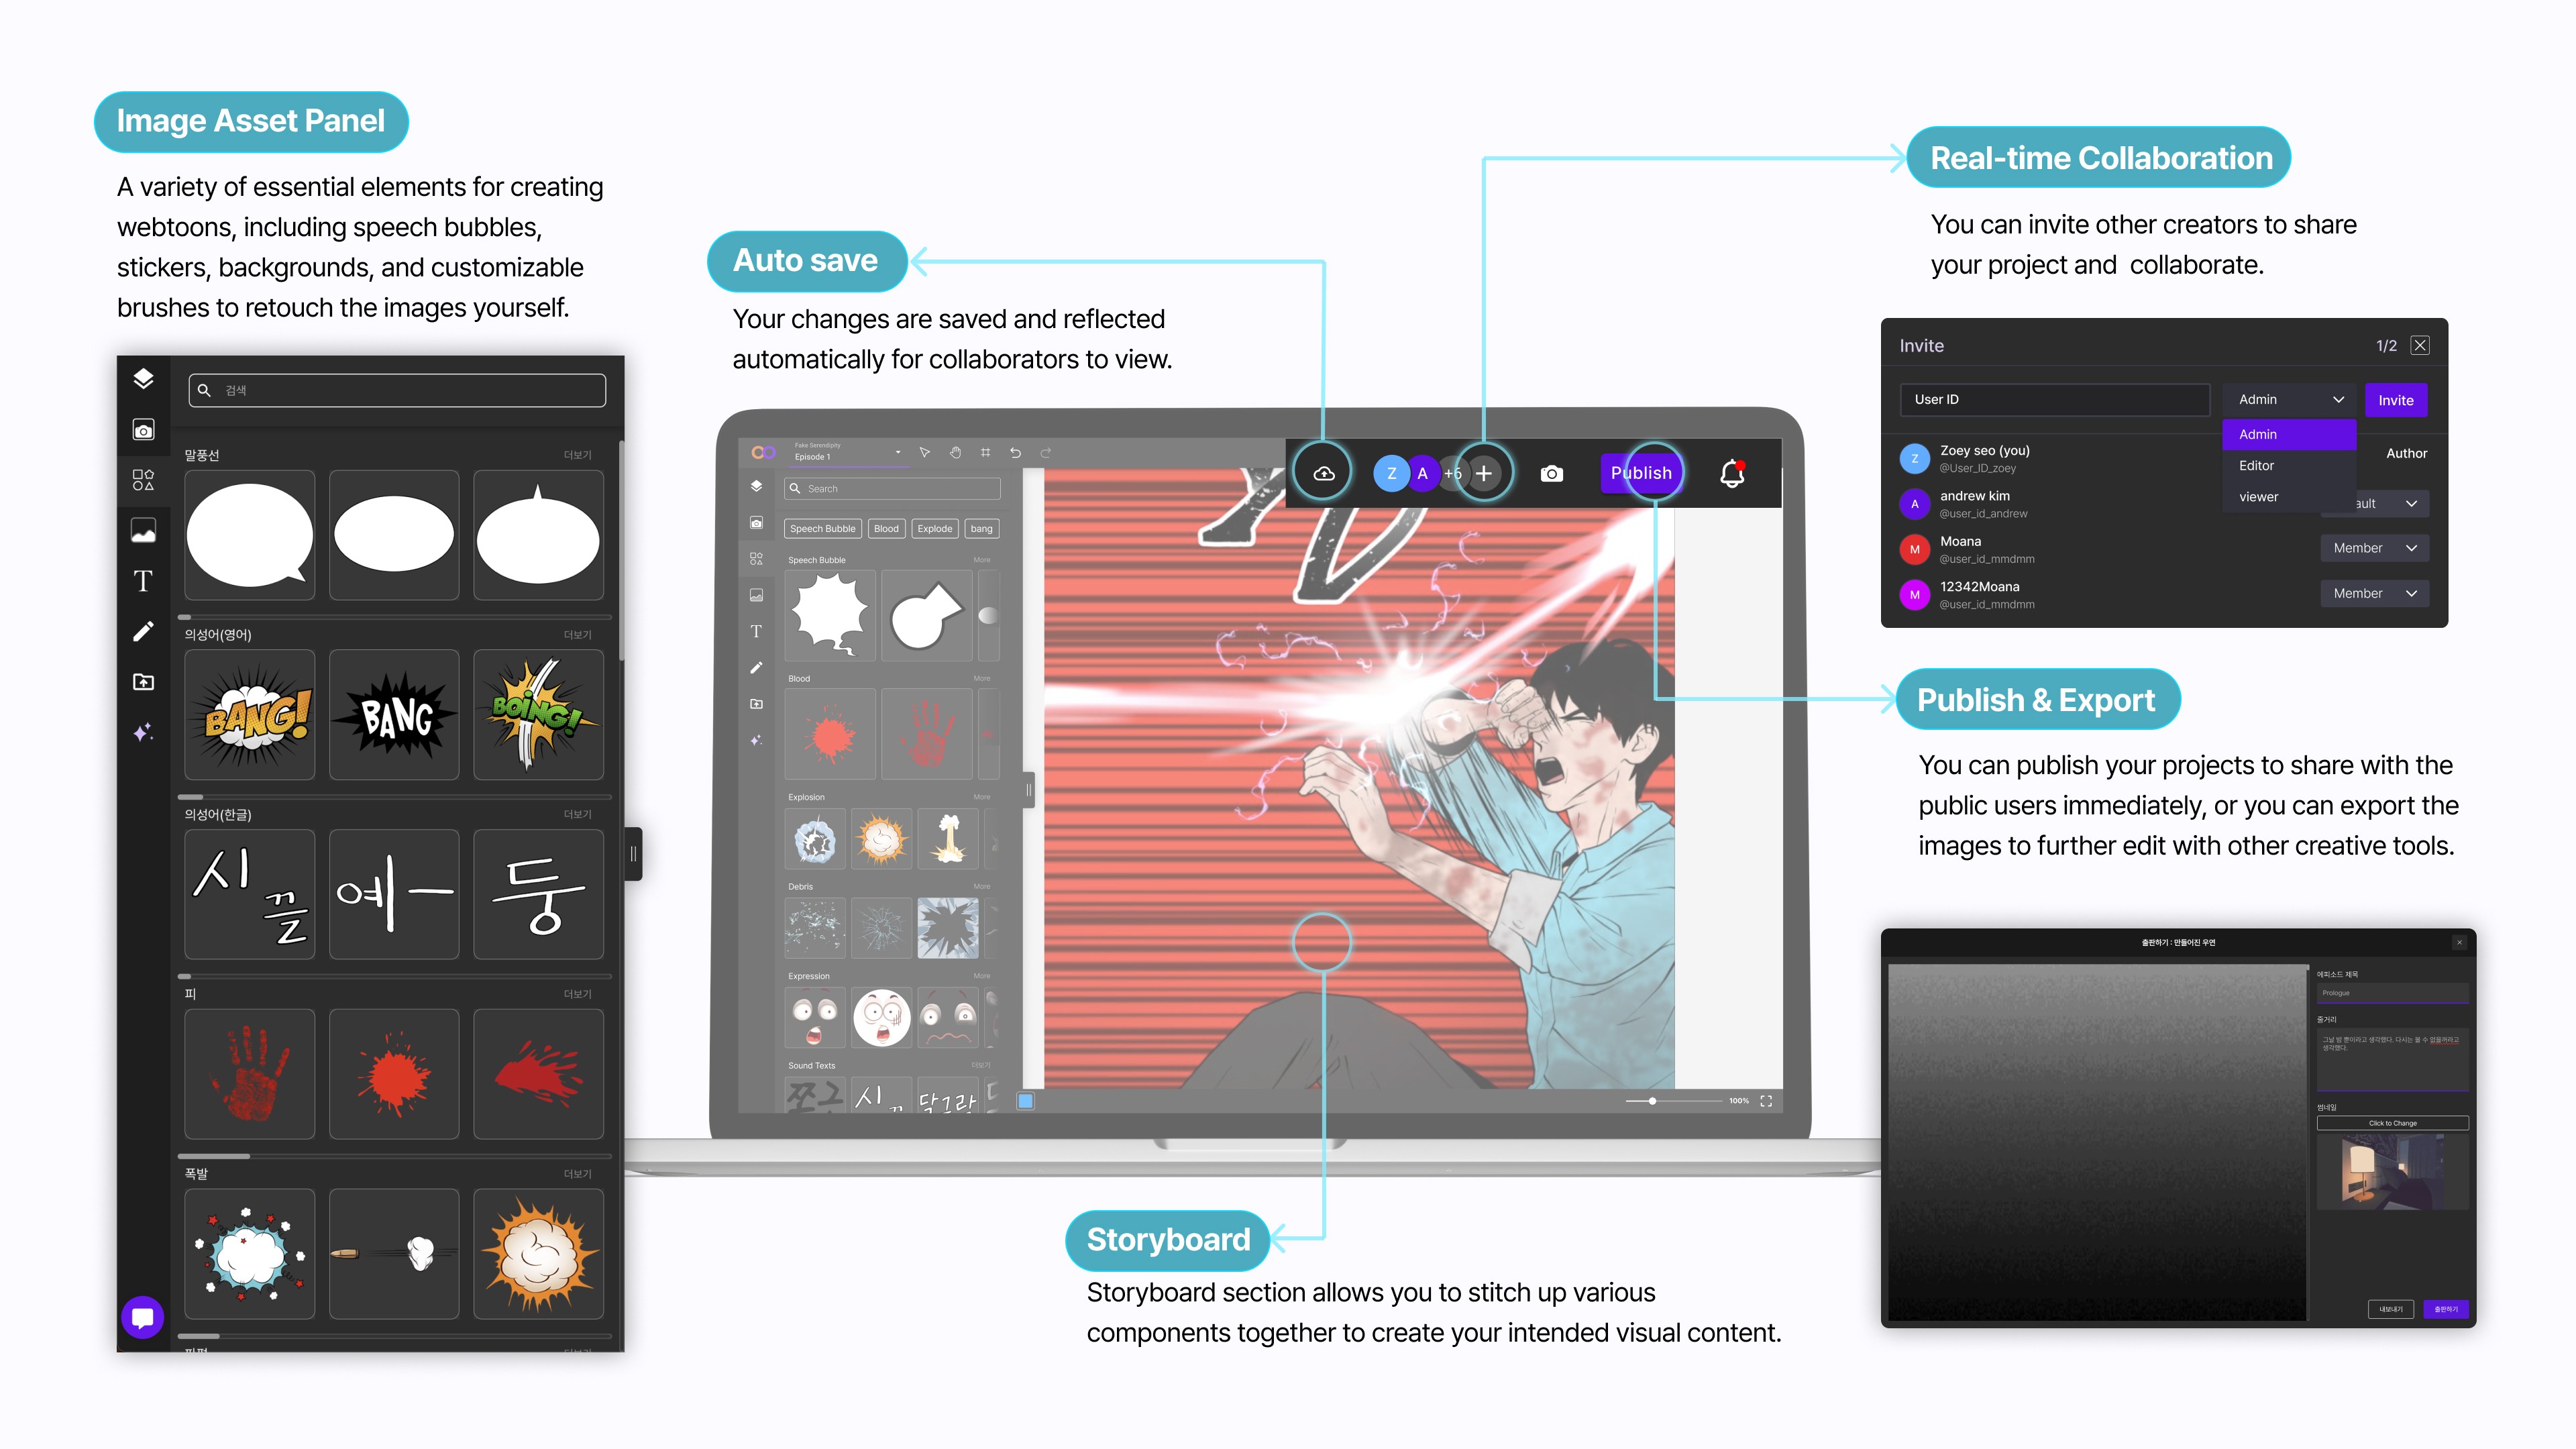
1. Image Asset Panel (Left Side of the Screen)
The image asset panel is a space where you can select visual elements such as speech bubbles, stickers, background effects, brushes, and subtitles.
Basic visual elements necessary for finishing various content such as webtoons, posters, and card news are organized and can be applied directly to scenes in a drag-and-drop manner.
2. Auto Save Function (Top Menu Bar)
Content worked on the canvas is automatically saved even if the user does not save, and this saved content is reflected in real-time to collaborators.
This allows work to be continued at any time and increases the stability of the tasks.
3. Real-time Collaboration Feature (Top Right Popup Window)
This collaboration feature allows other creators to be invited to edit and work on the same project simultaneously.
Invited users are assigned work permissions based on their roles (administrator, editor, viewer, etc.), and updates are reflected in real-time during joint work.
4. Publishing and Exporting Features (Bottom Right Mini Window)
The completed content can be immediately published or exported for external use.
The publishing feature allows projects to be saved in a shareable format so that they can be made public to general users, and the exporting feature allows captured images or edited scenes to be brought into different projects for further work.
5. Storyboard Section (Central Workspace)
The storyboard section is the space to arrange captured images and edited visual elements in order to compose the final product.
In this area, you can organize scenes according to the creator's intent and insert subtitles, speech bubbles, and effects to clarify the flow of the content.
📌 Summary
The canvas feature of Toonit is the final step of composing and refining scenes, designed as an editing environment that enables users to visually complete stories, collaborate, and organize into final content.
[Toonit Characters]
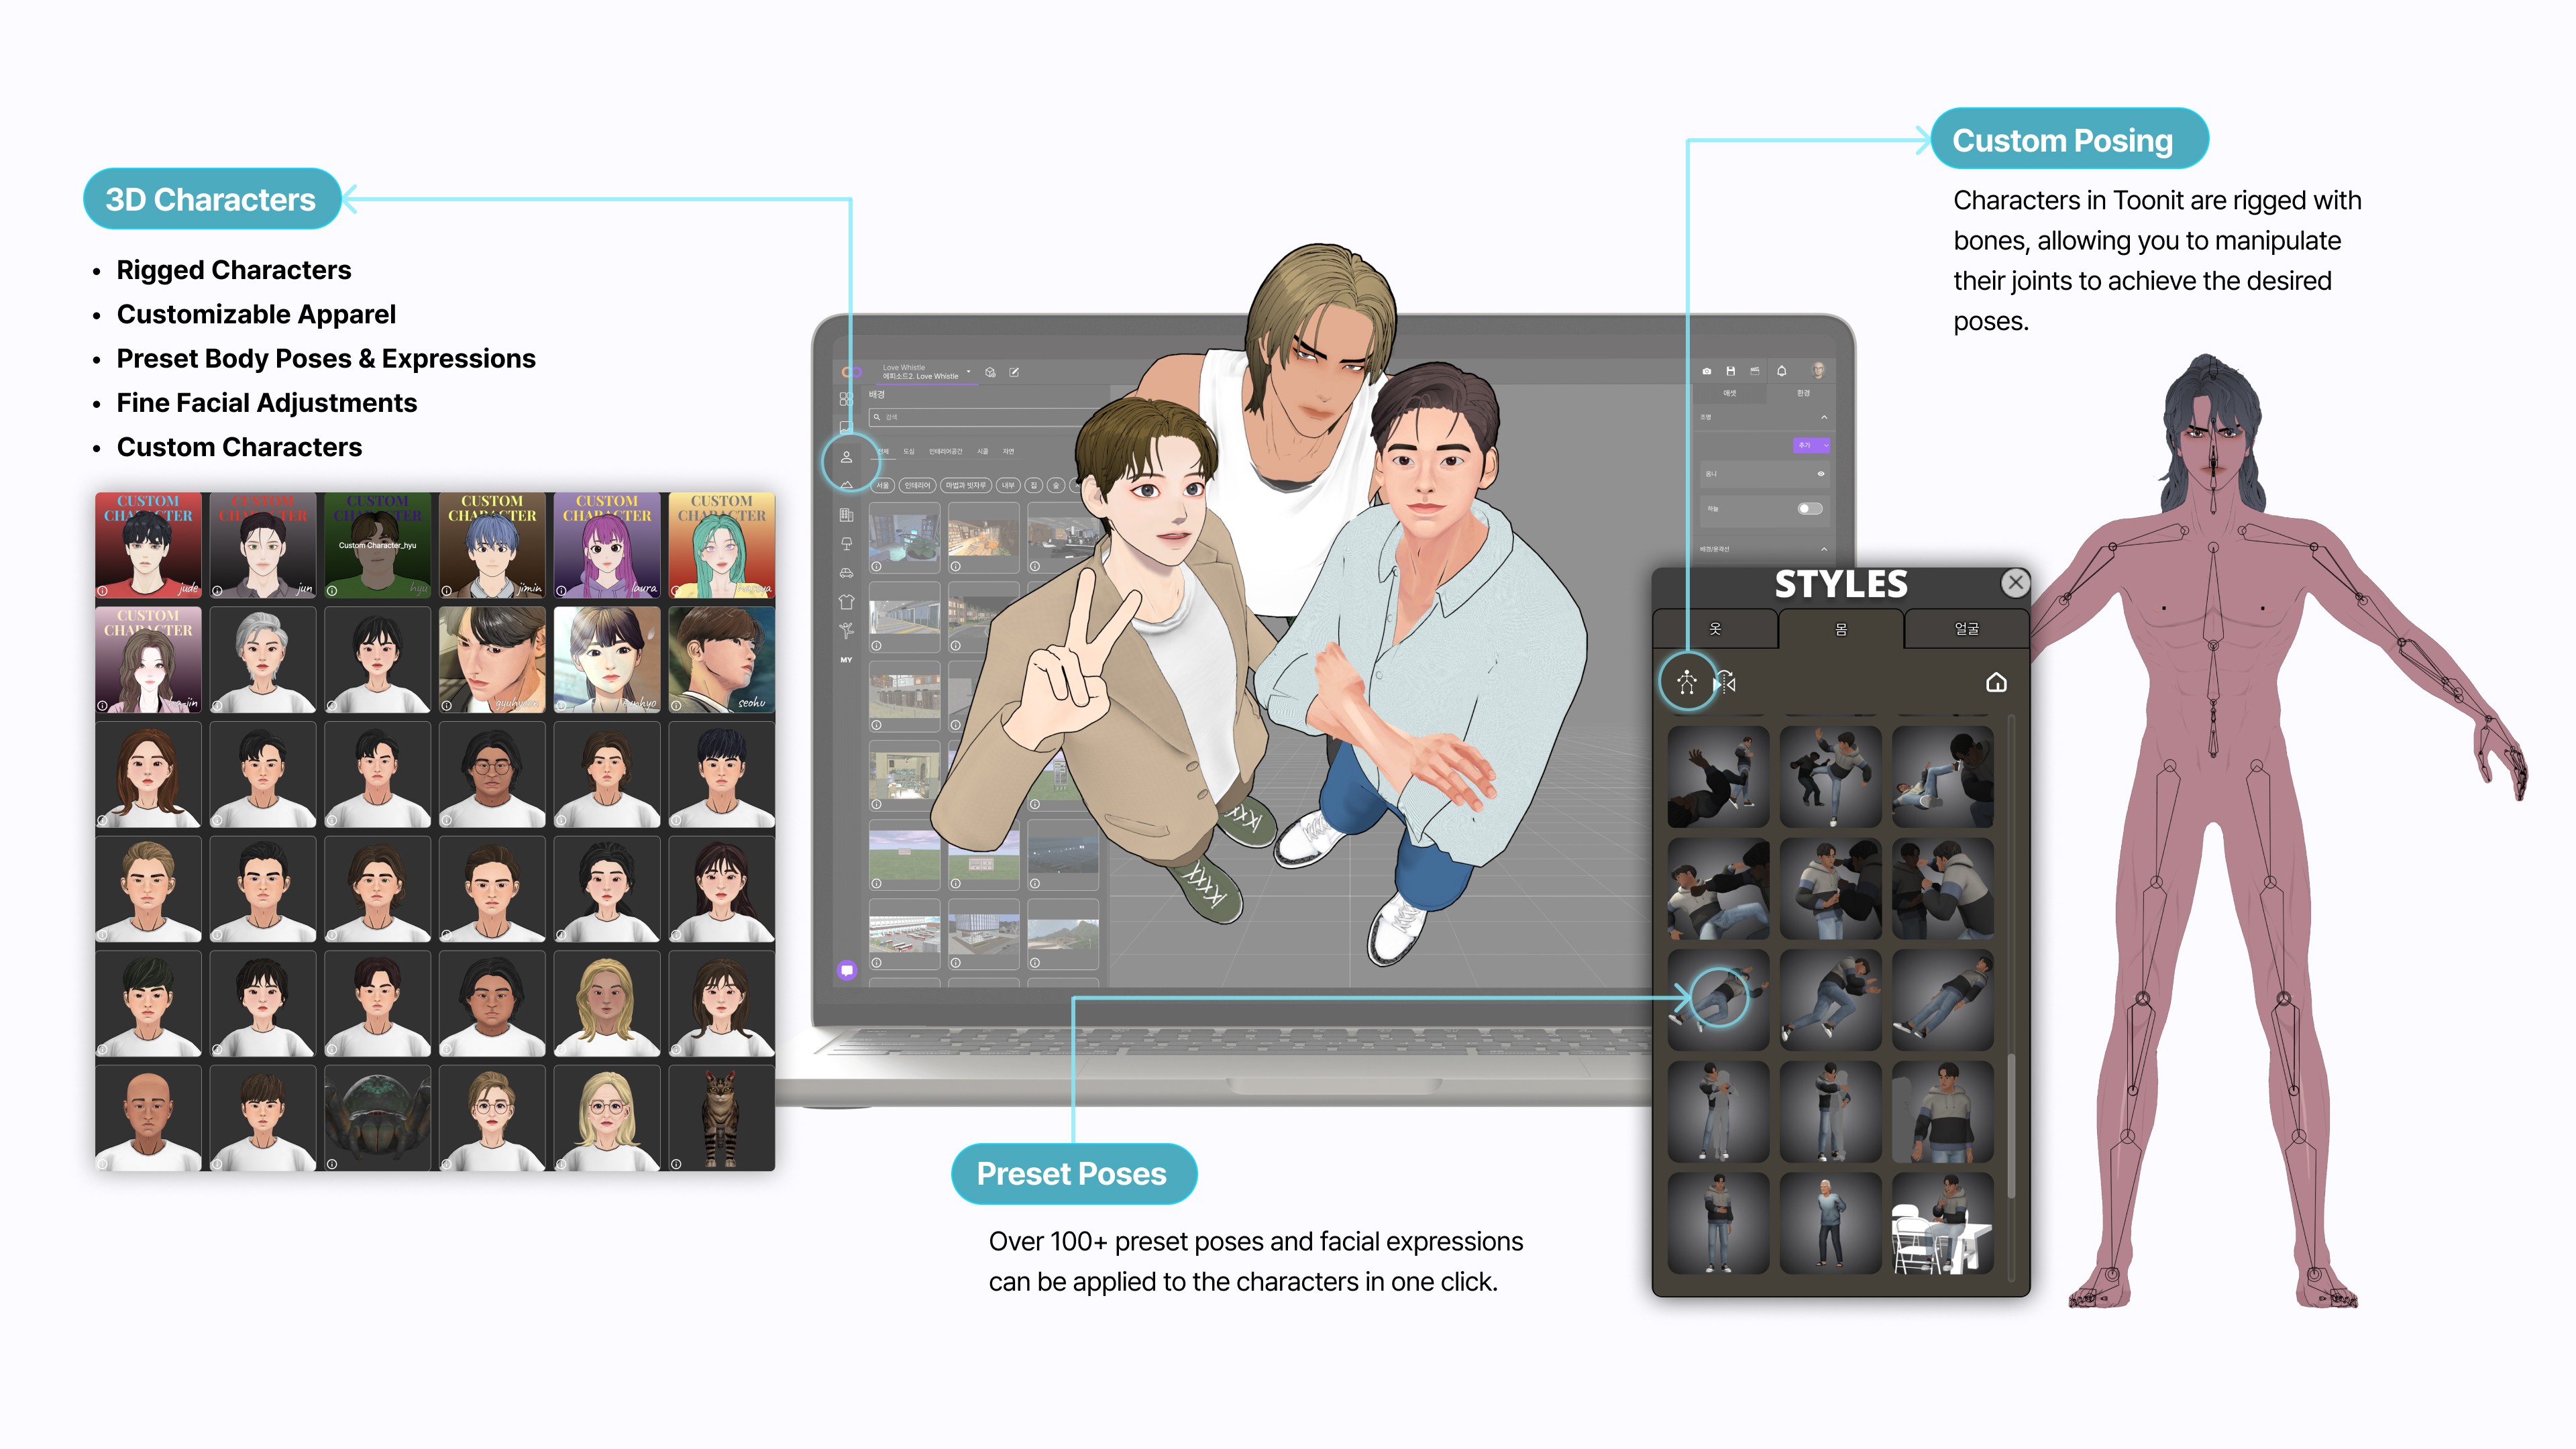
1. 3D Character Panel (Left Side of the Screen)
Toonit offers a variety of styles of 3D characters, each pre-rigged so you can immediately apply poses or animations.
Characters can be freely customized in terms of facial features, clothing, hairstyles, and users can adjust characters to match their desired appearance or personality.
Additionally, body poses and facial expressions are provided as presets, allowing for much simpler and more intuitive staging.
2. Preset Poses (Bottom Right of the Screen – Style Window)
Toonit offers over 1,000 different preset poses.
These poses are designed to cover a wide range from everyday actions to emotional expressions and can be applied to characters with a single click.
Poses can also be categorized as full-body movements or part poses (upper body, lower body, etc.) for detailed staging.
3. Custom Pose Manipulation (Right Side of the Screen – Character Manipulation Screen)
All characters provided by Toonit are rigged, enabling users to manipulate character joints directly to create their own poses.
Individual body parts such as arms, legs, and waist can be moved independently, allowing for original staging beyond limited presets.
Custom poses are very useful for storytelling or emotional expressions and can be saved for repeated use.
📌 Summary
The character system of Toonit is designed to enable high-quality staging intuitively without professional 3D knowledge, from basic character selection to customization, applying preset poses, and detailed joint adjustments.
This feature provides great efficiency, especially for users who need to compose many scenes in a short amount of time for webtoons, animations, or storyboards.

